Master All Features in 10 Minutes
Quickly learn the core features of StageText through hands-on experience.
This guide takes you through the basic flow of subtitle production—from adding new subtitles and tracks to editing styles to display—allowing you to experience it all firsthand.
Follow the guide step by step alongside the images.
Step 0: Installing StageText
Download
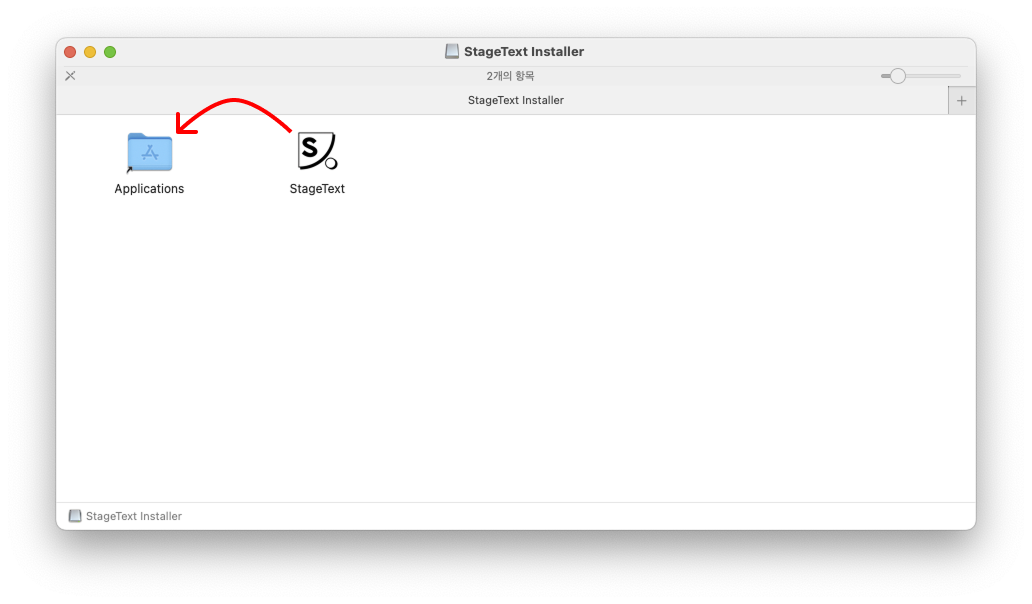
Installation
- Run the downloaded StageText.dmg file
- Drag and drop the StageText app to the Applications folder
3. Once installation is complete, you can run StageText from the Applications folder
Step 1: Launching StageText
When StageText launches, you'll see 3 windows.
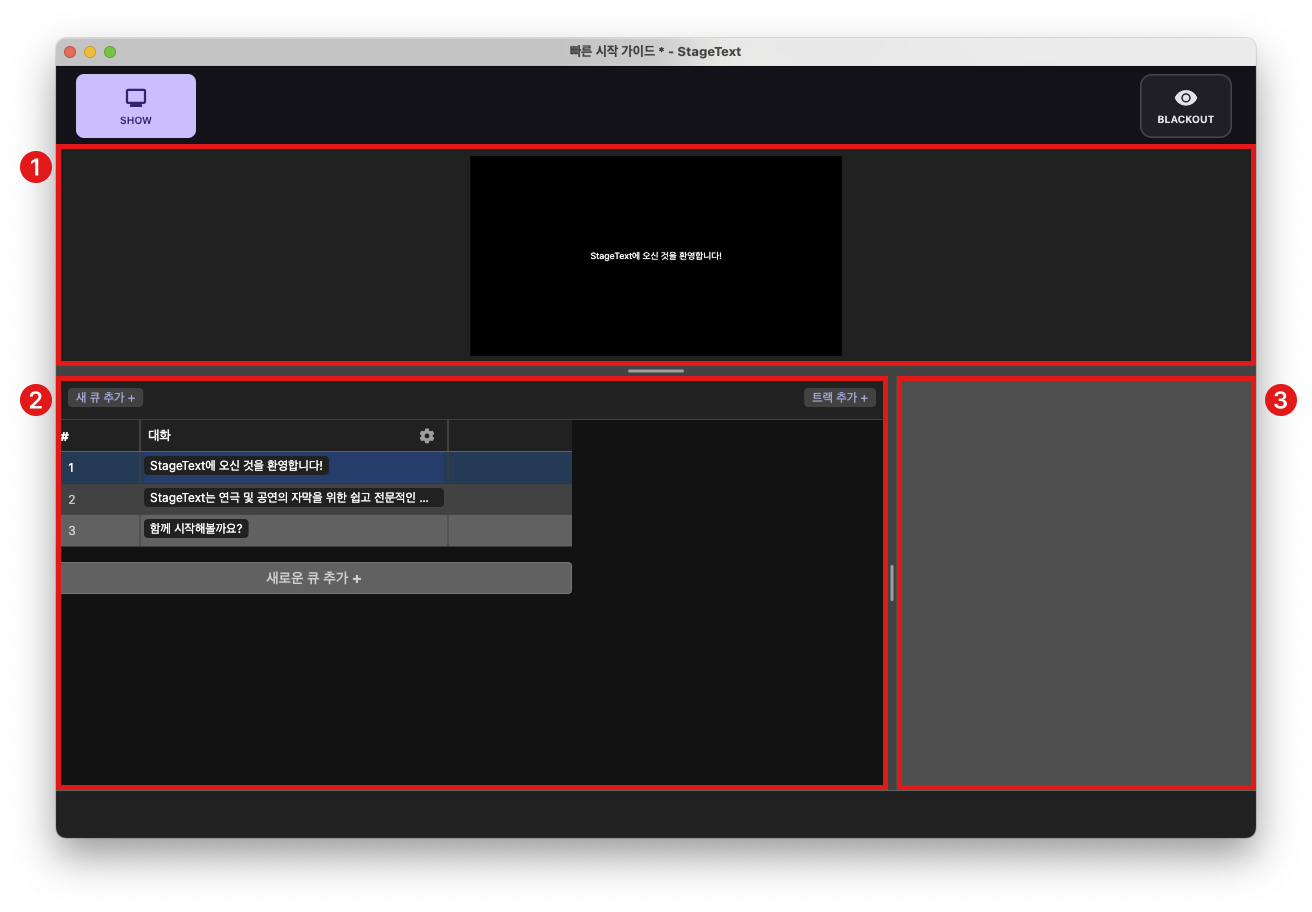
1. Preview Window
This area lets you preview the output of the currently selected cue.
When you edit lines or styles, you can see the changes in real-time.
2. Table Window
This window lets you view all cues in your project at a glance and add or modify cues.
3. Inspector Window
This window lets you edit the style of the selected track or line.
Step 2: Creating Your First Subtitle
Let's start with a simple dialogue scenario.
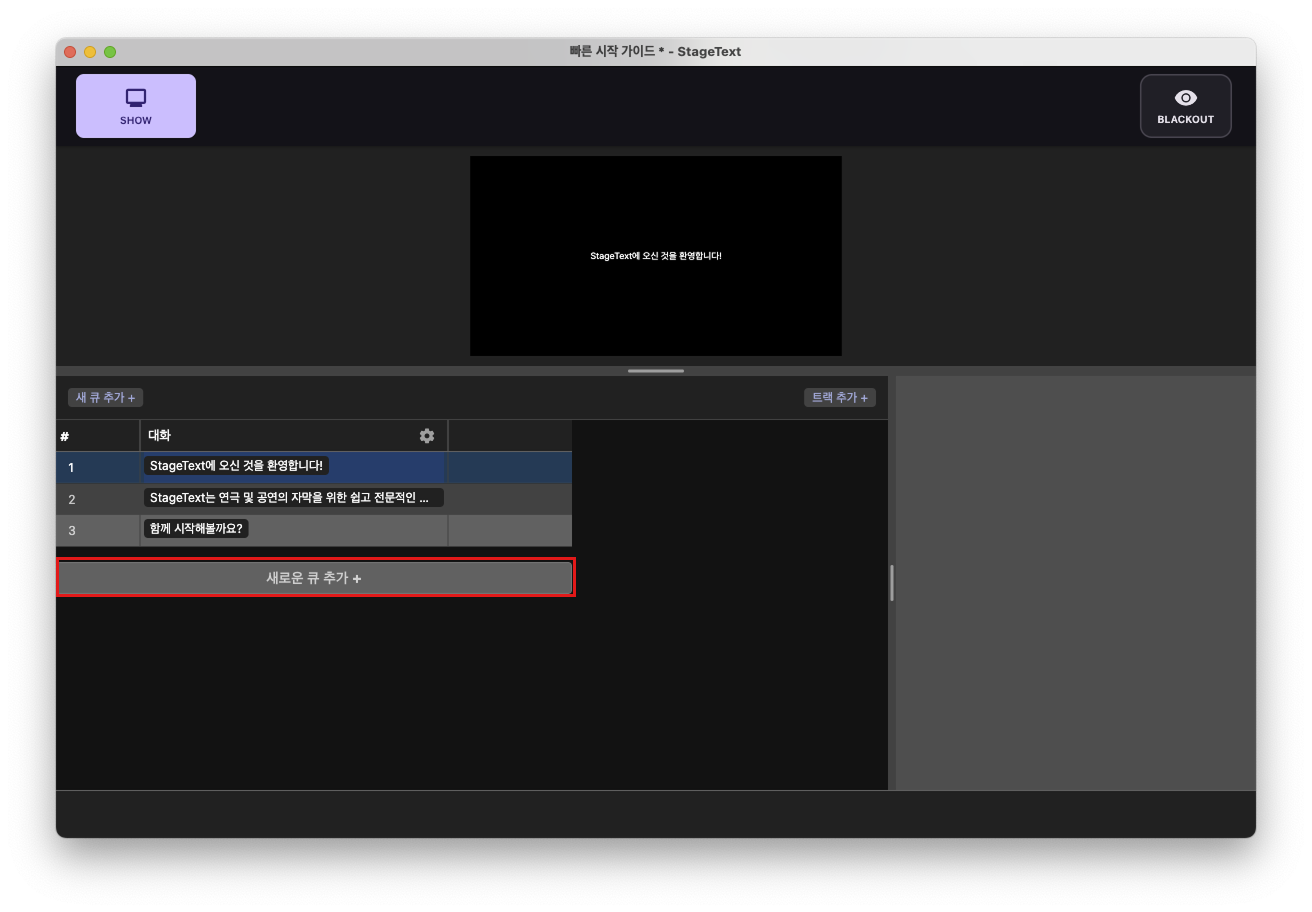
1. Click the 'Add New Cue +' button in the table window.
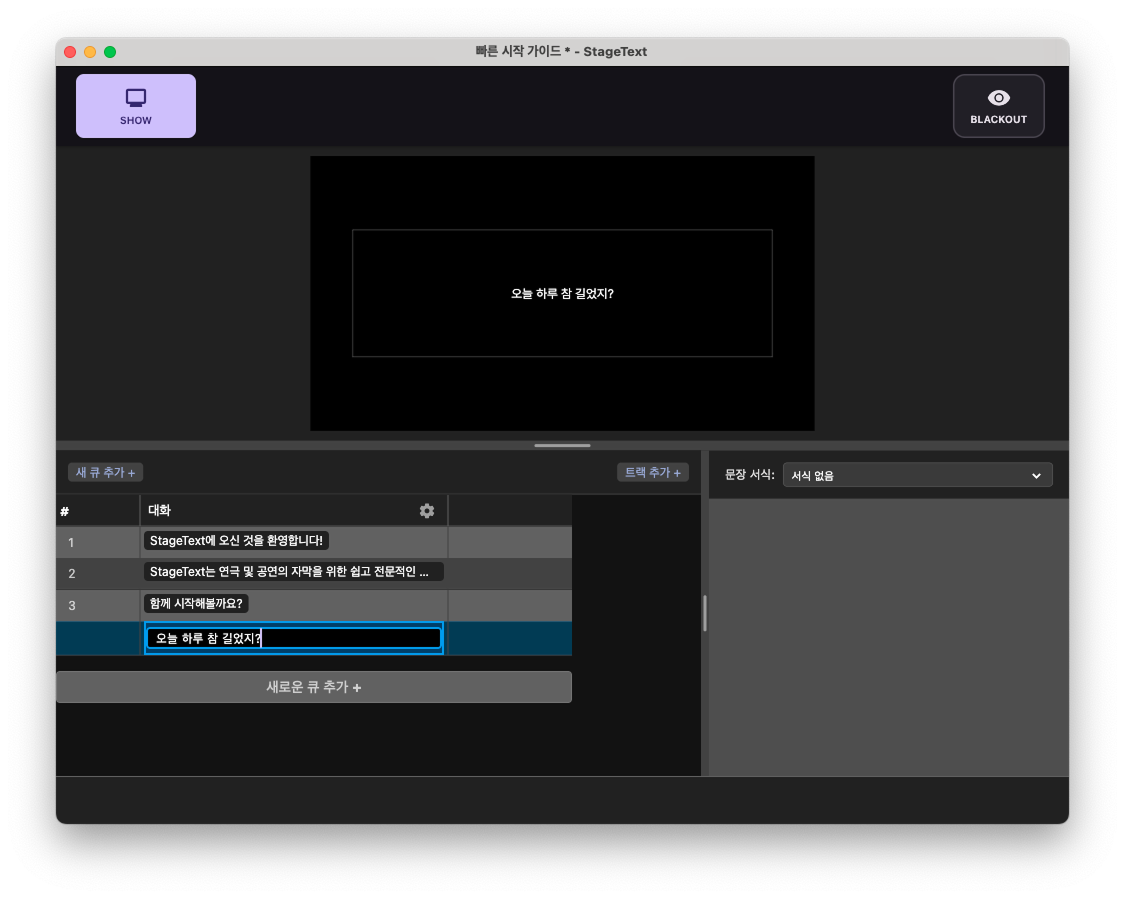
2. A new cue is created, and the 'Dialogue' track cell is automatically selected. Press the Enter key to enter line editing mode. (You can also start editing mode by double-clicking the cell or typing a character.)
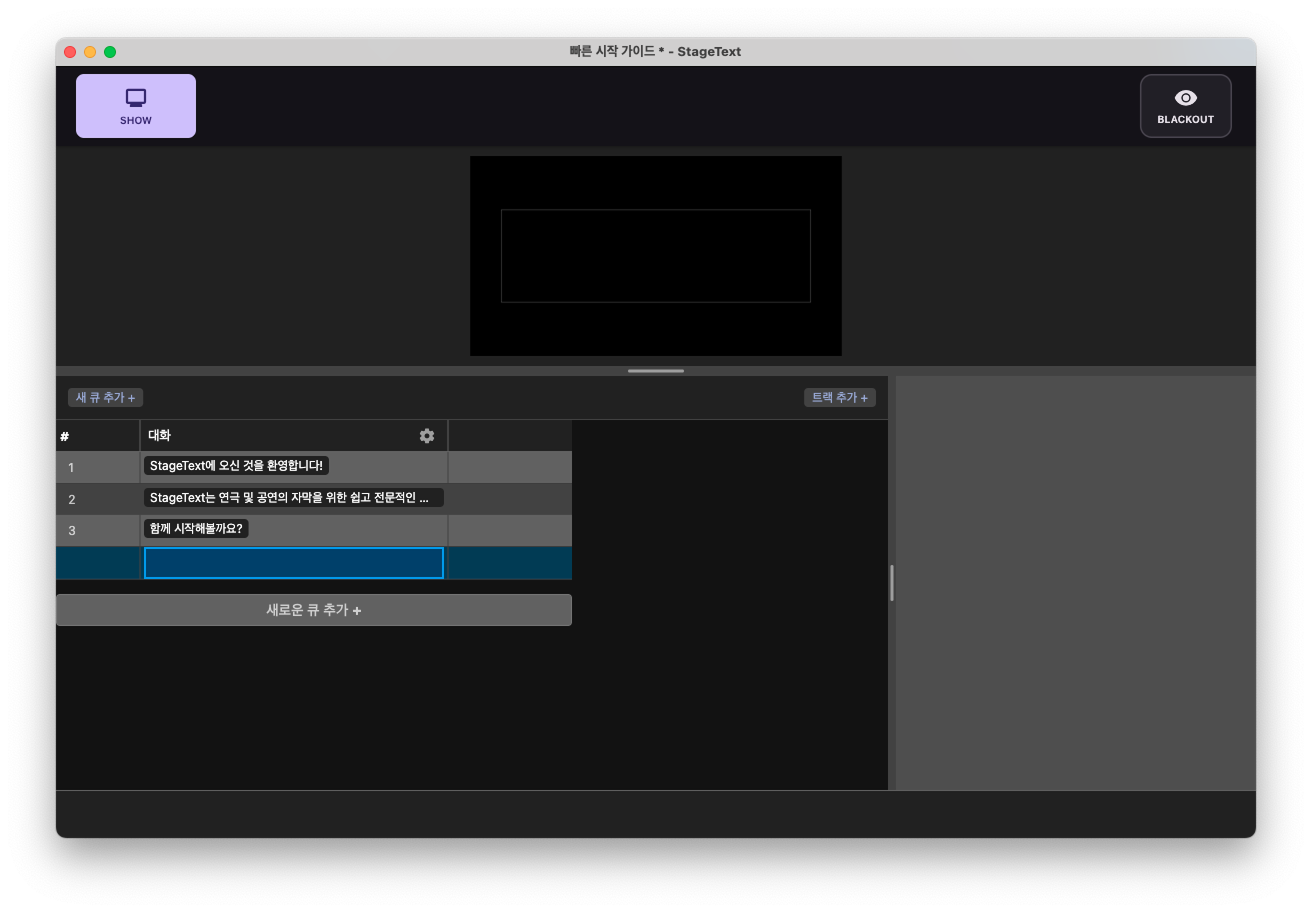
3. Enter the line content and press Enter to complete editing.
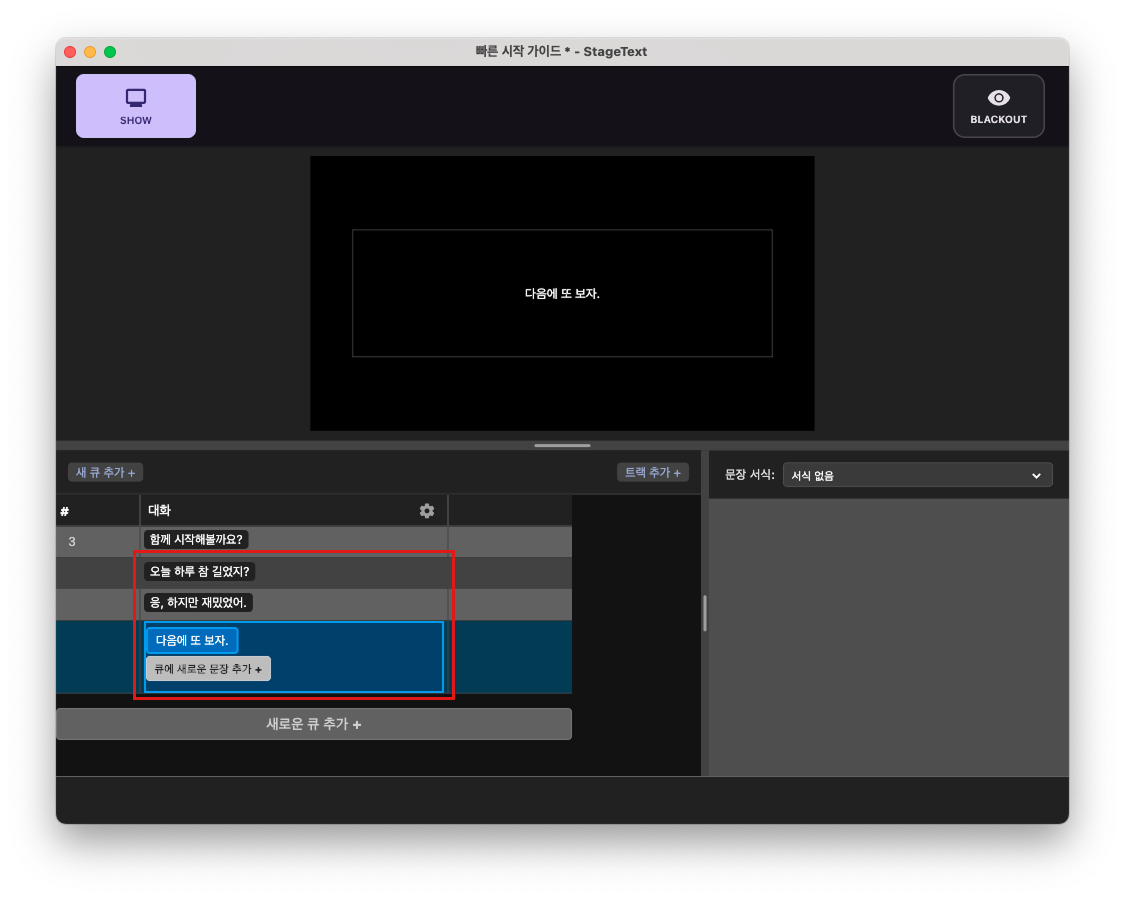
4. Similarly, click the 'Add New Cue +' button and enter lines to add two lines as shown below.
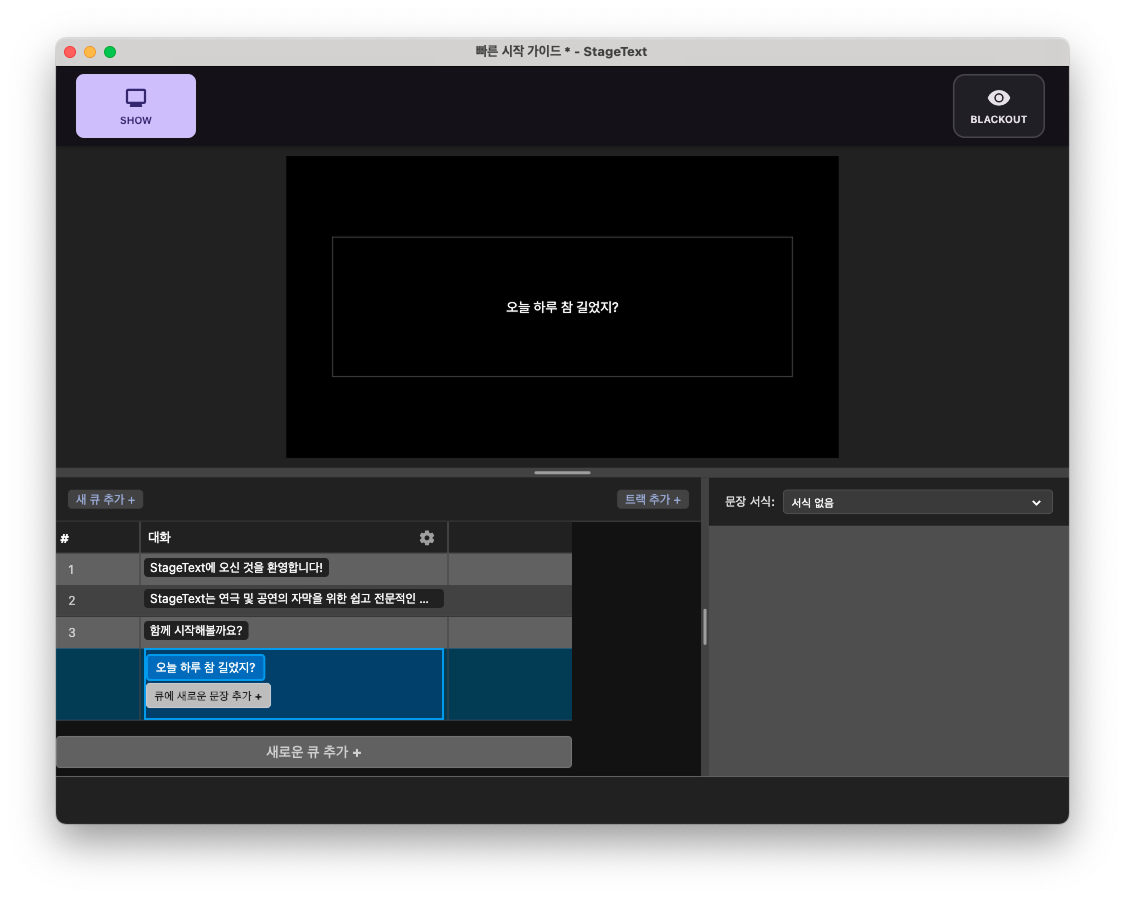
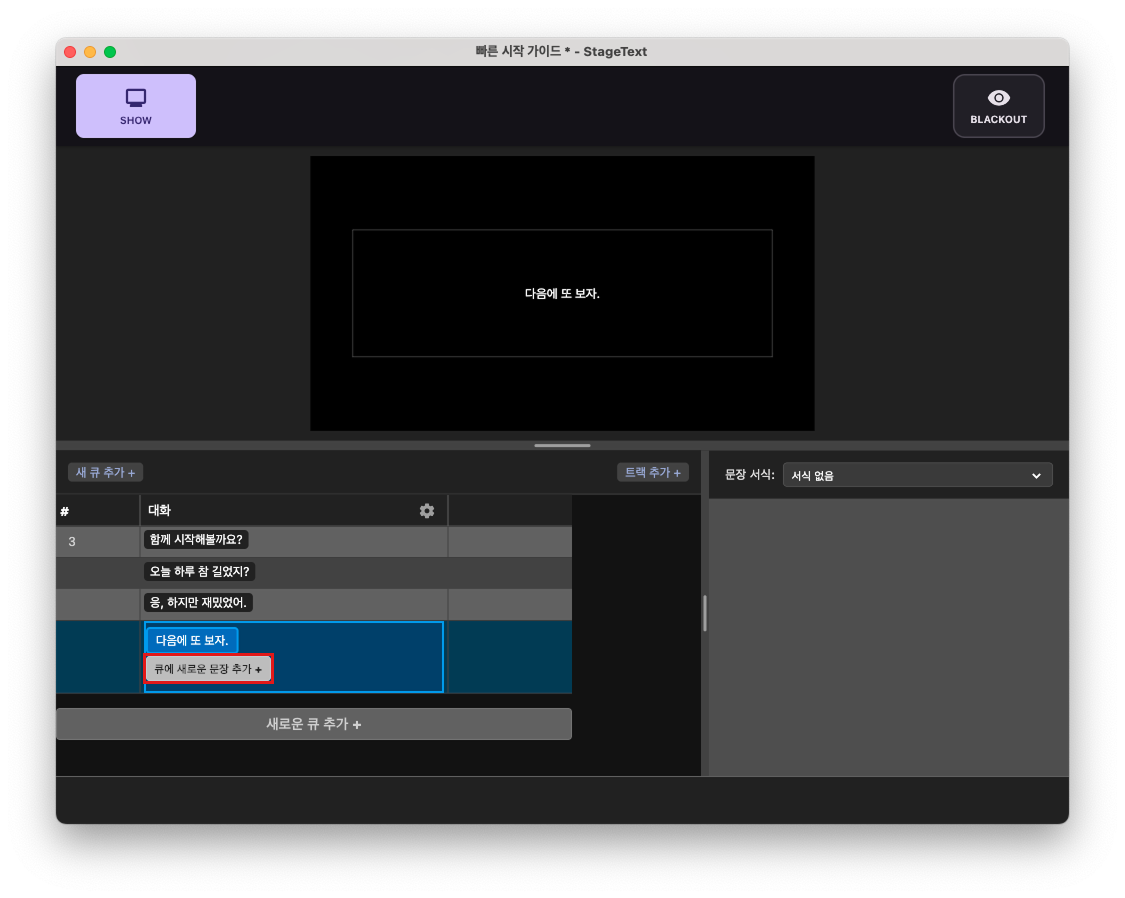
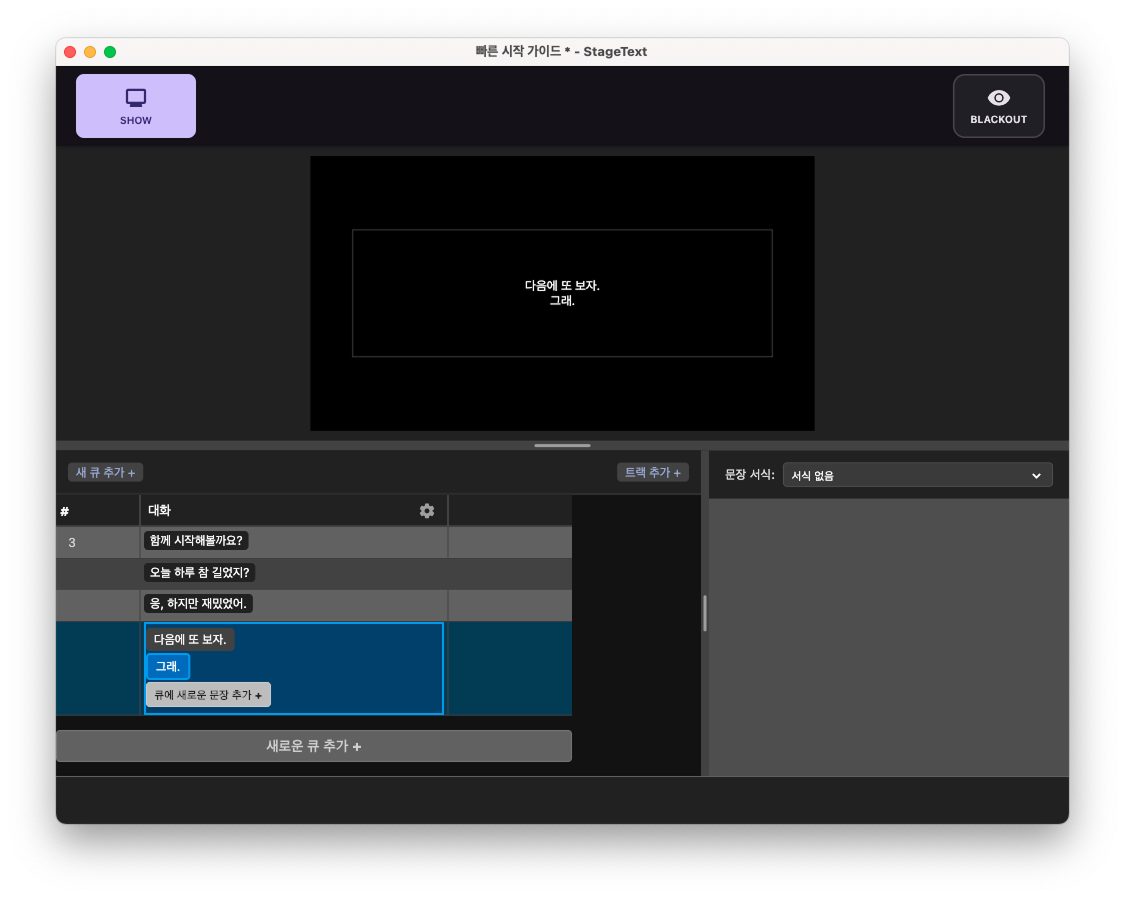
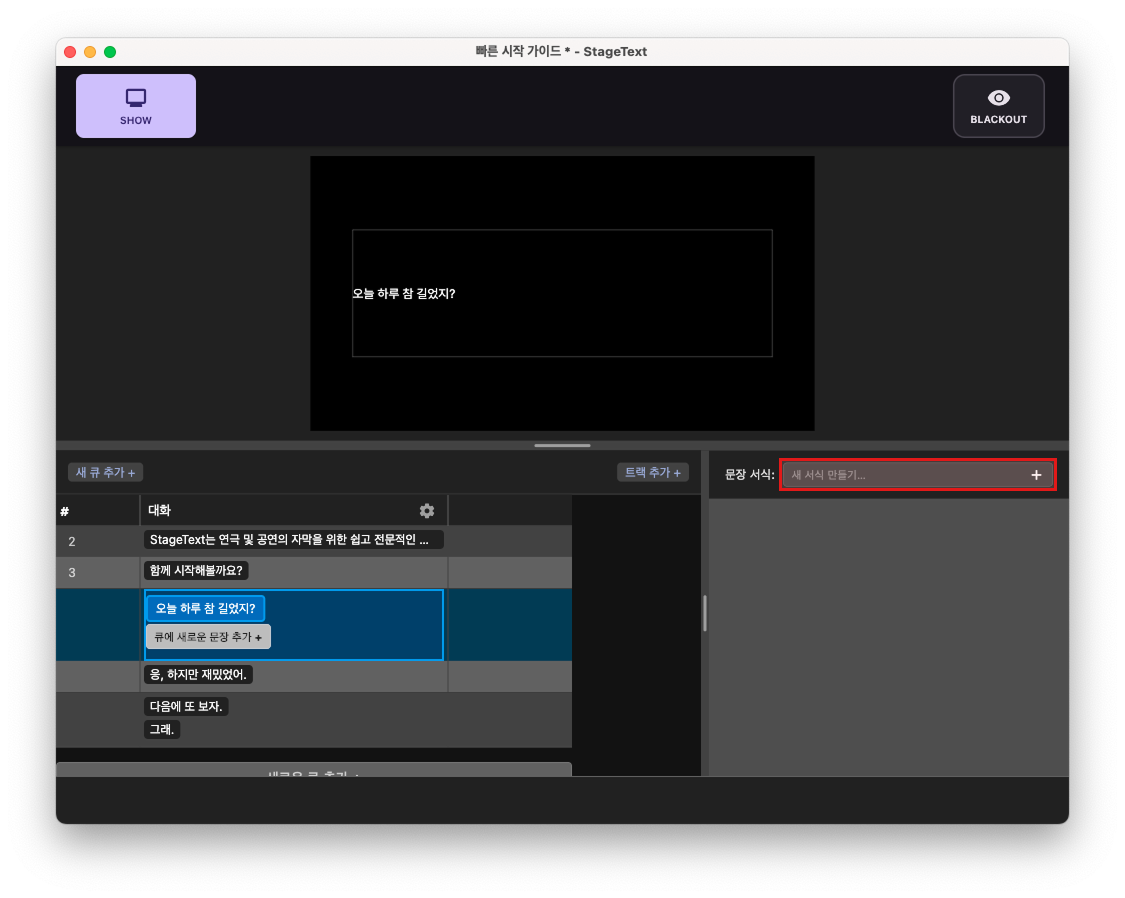
5. Let's put two lines in one cue. Click the 'Add New Line to Cue +' button.
6. Enter the line and press Enter to complete editing.

Step 3: Setting Track Default Formatting
Let's set the default formatting for the track.
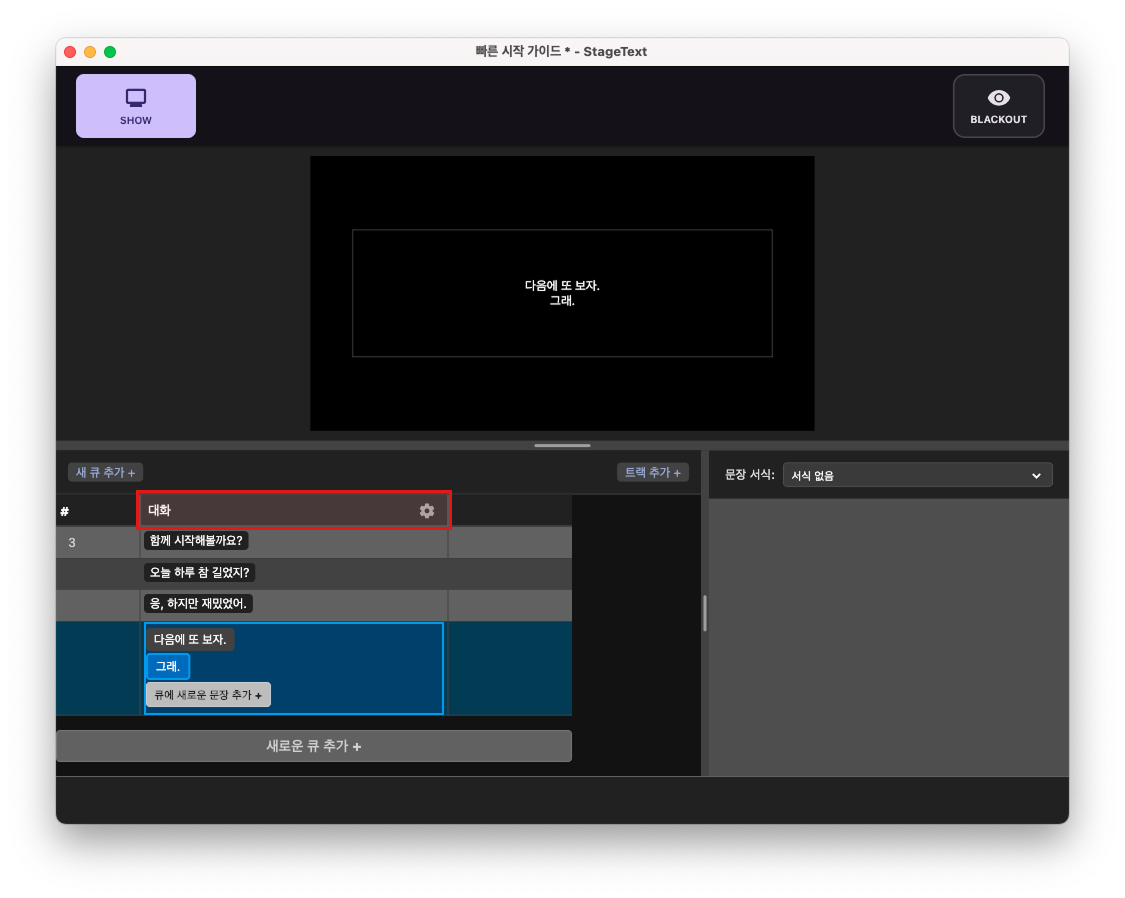
1. Click the track's header area.
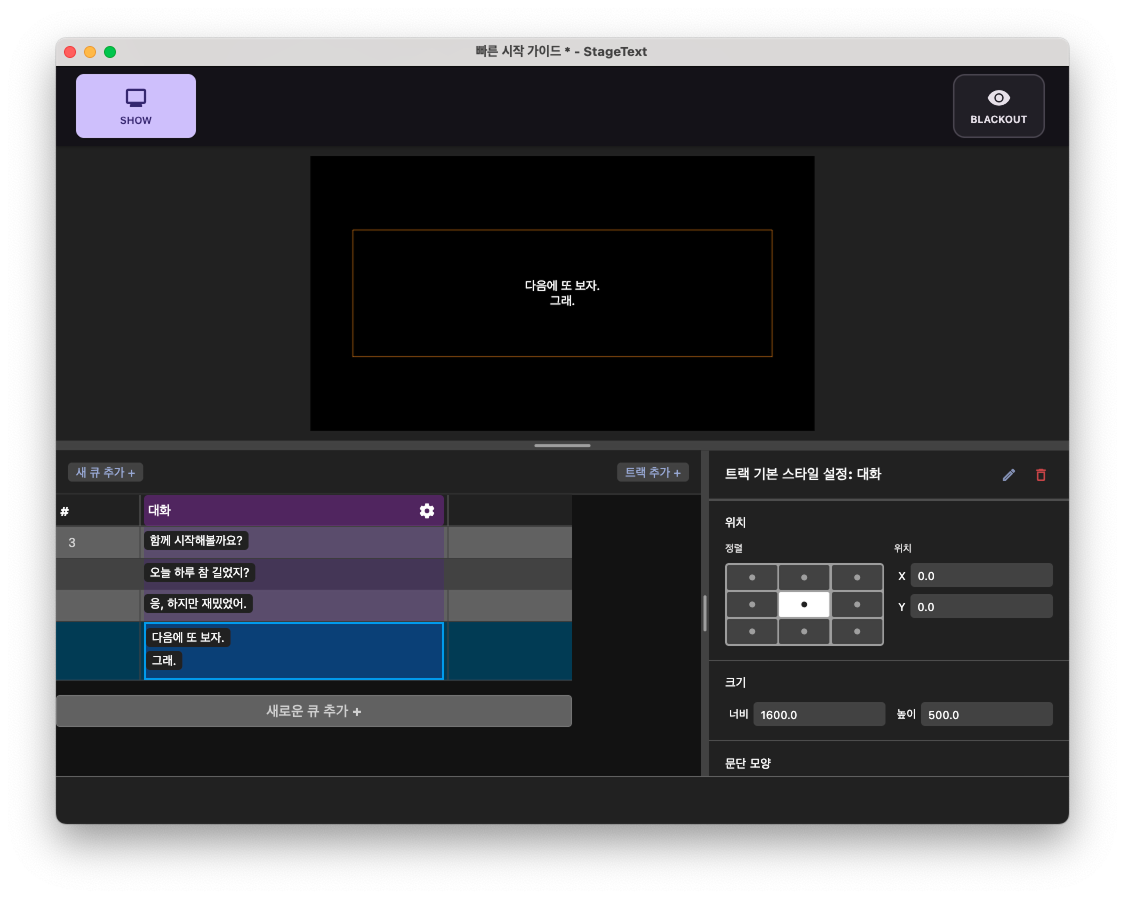
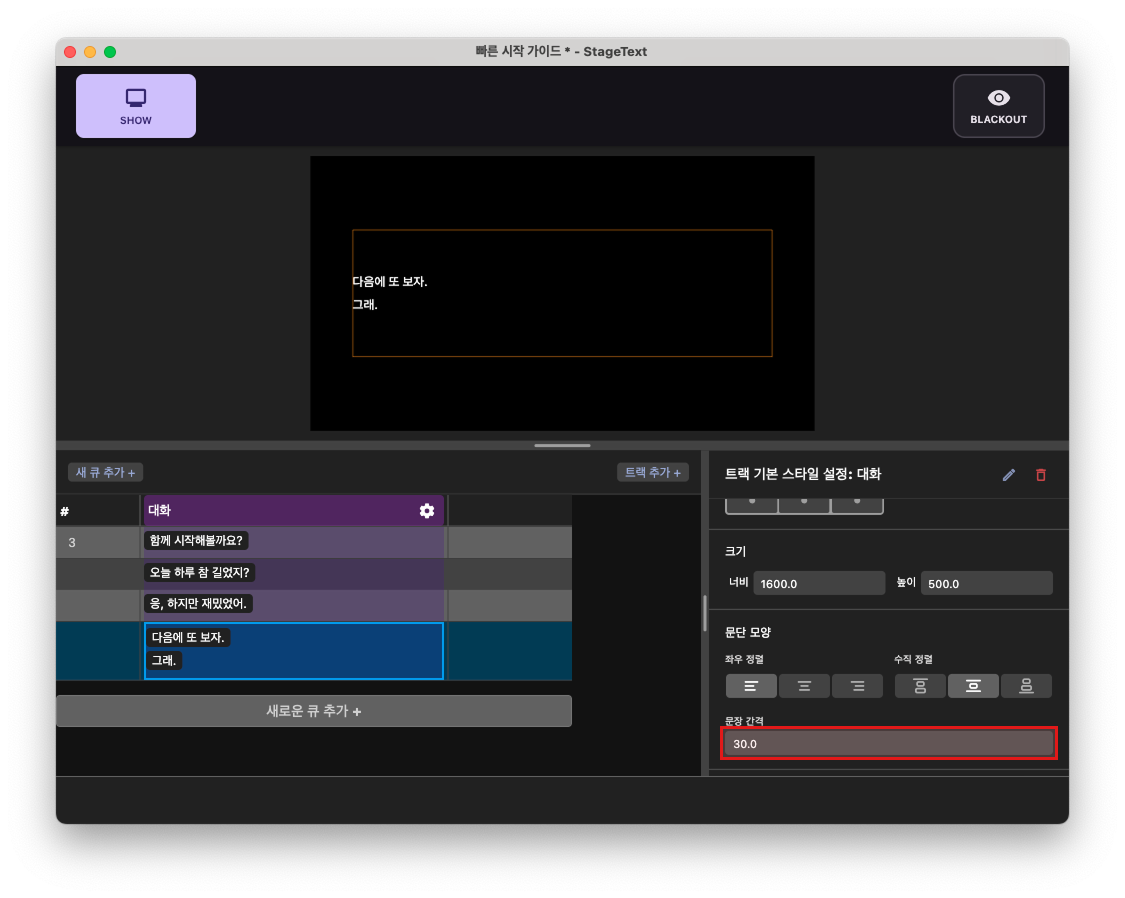
2. Scroll down the inspector window and change the horizontal alignment to Left Align.

3. Then set the line spacing to 30.
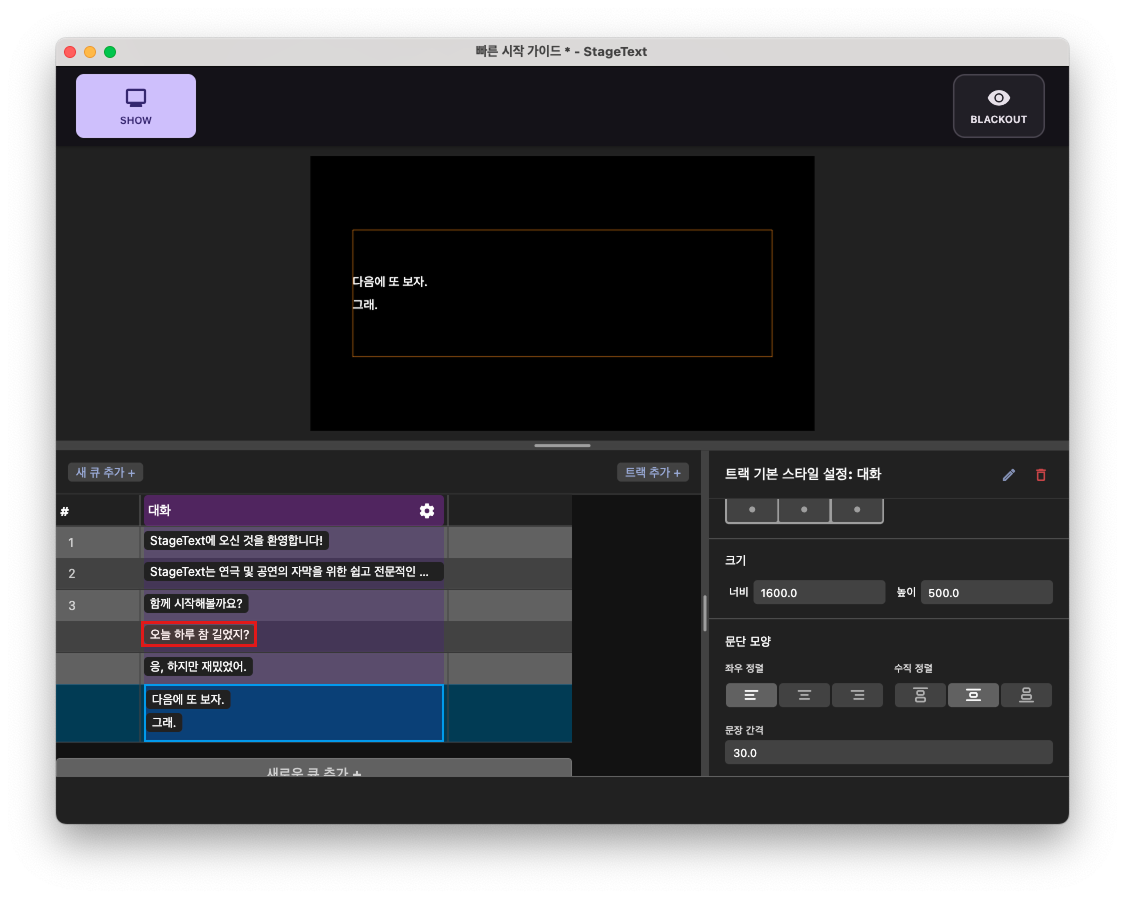
Step 4: Creating Character-Specific Formatting
Let's create formatting for each character.
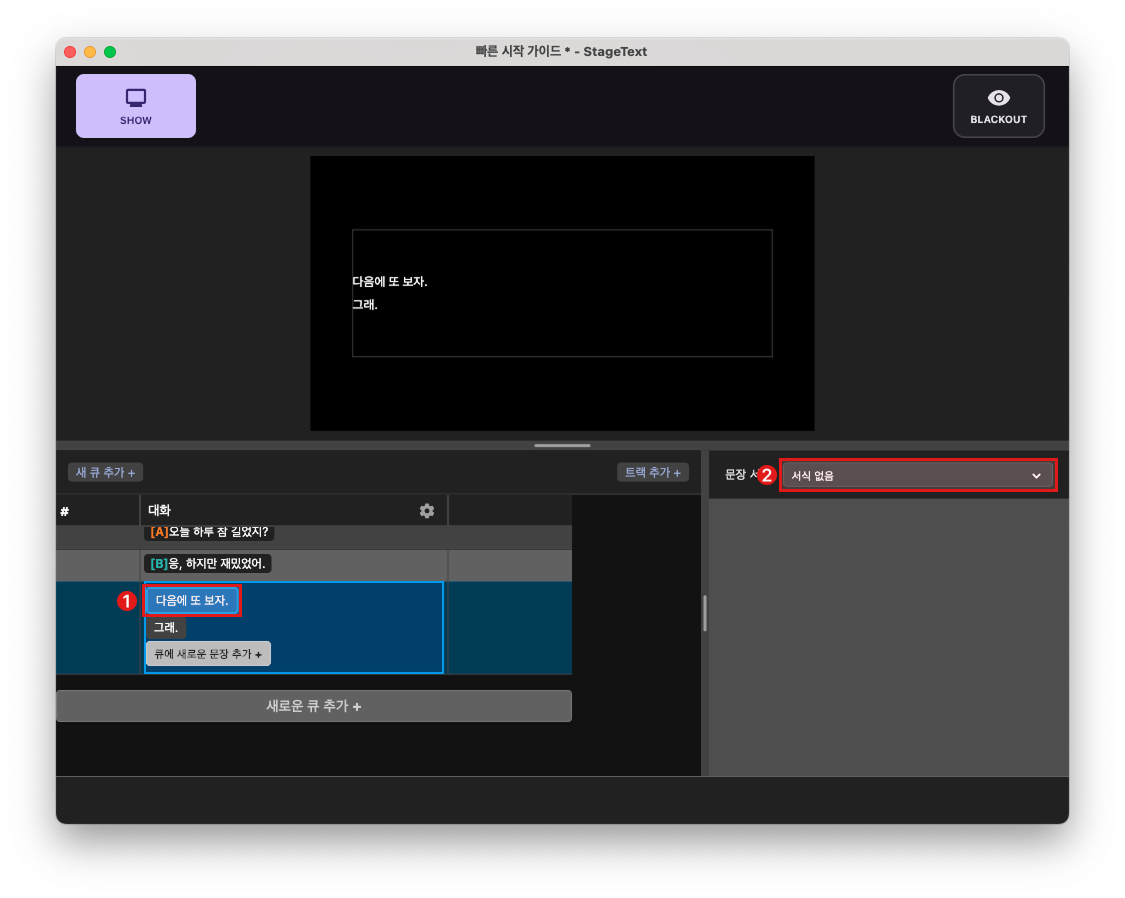
1. Click the line "It's been a long day, hasn't it?" (Click the line text, not the cell!)
2. Click the Create New Style... button in the inspector window.
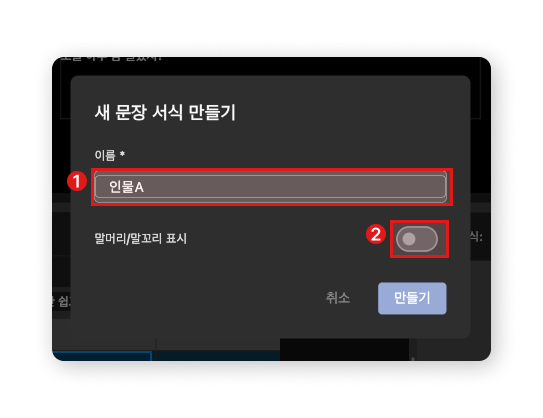
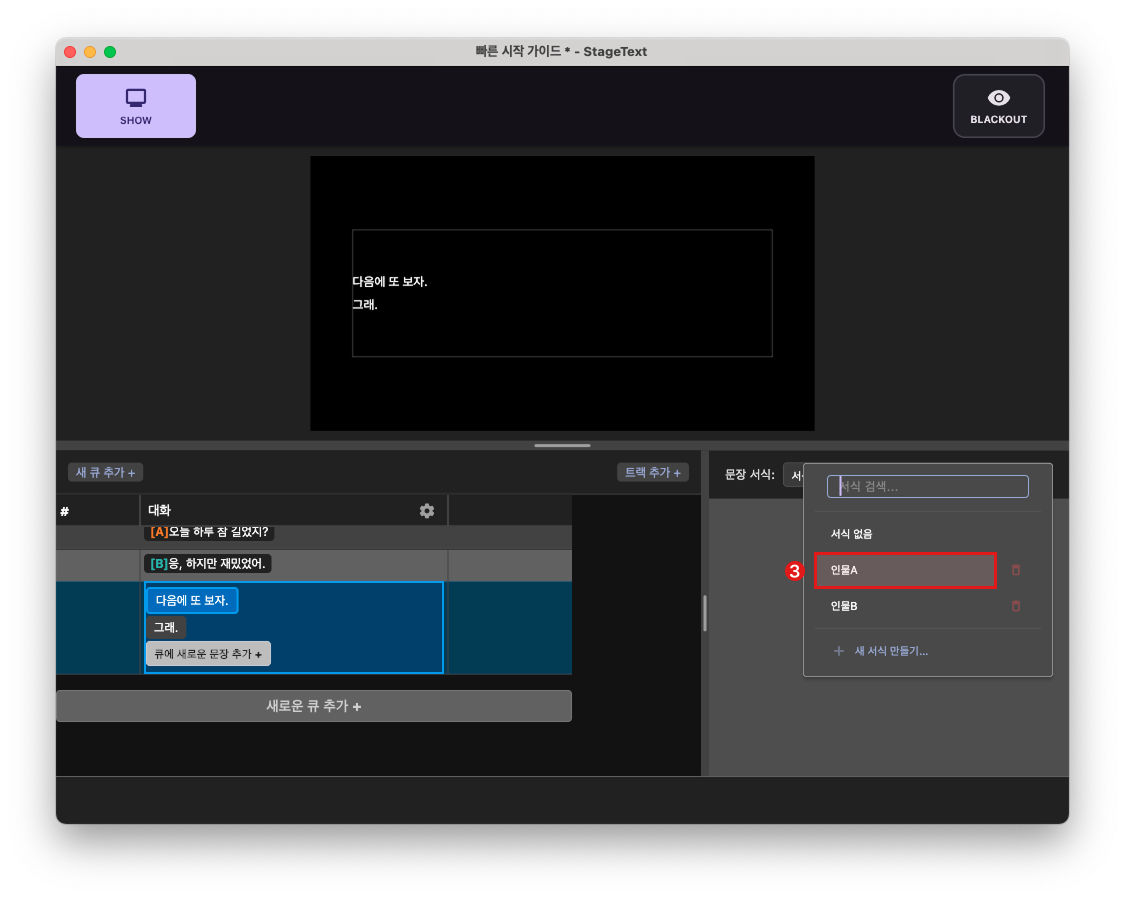
3. When the popup opens, enter Character A in the name field and toggle on the prefix/suffix display.
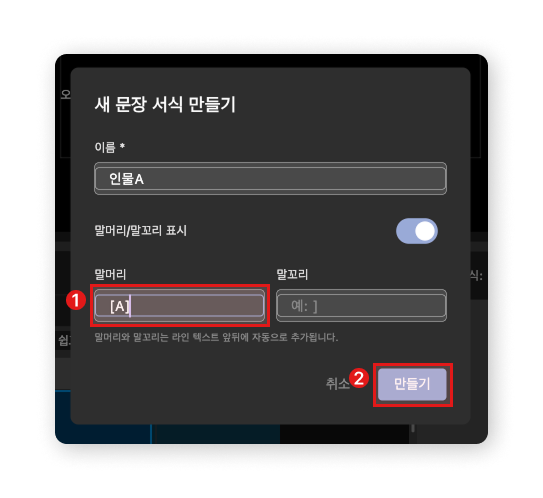
4. When the prefix and suffix edit fields appear, enter [A] in the prefix field and click the Create button to create the style.
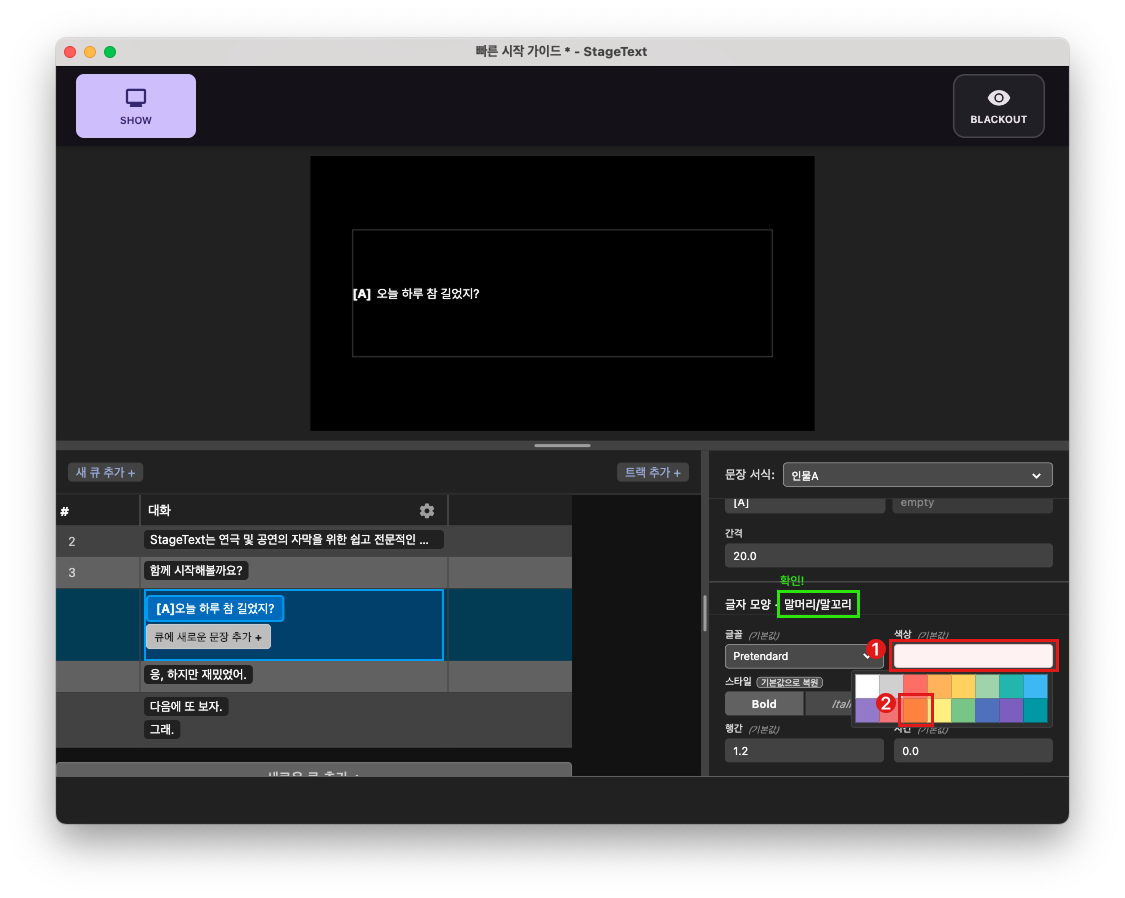
5. Scroll down the inspector window to the 'Text Appearance - Prefix/Suffix' section and modify the prefix color.
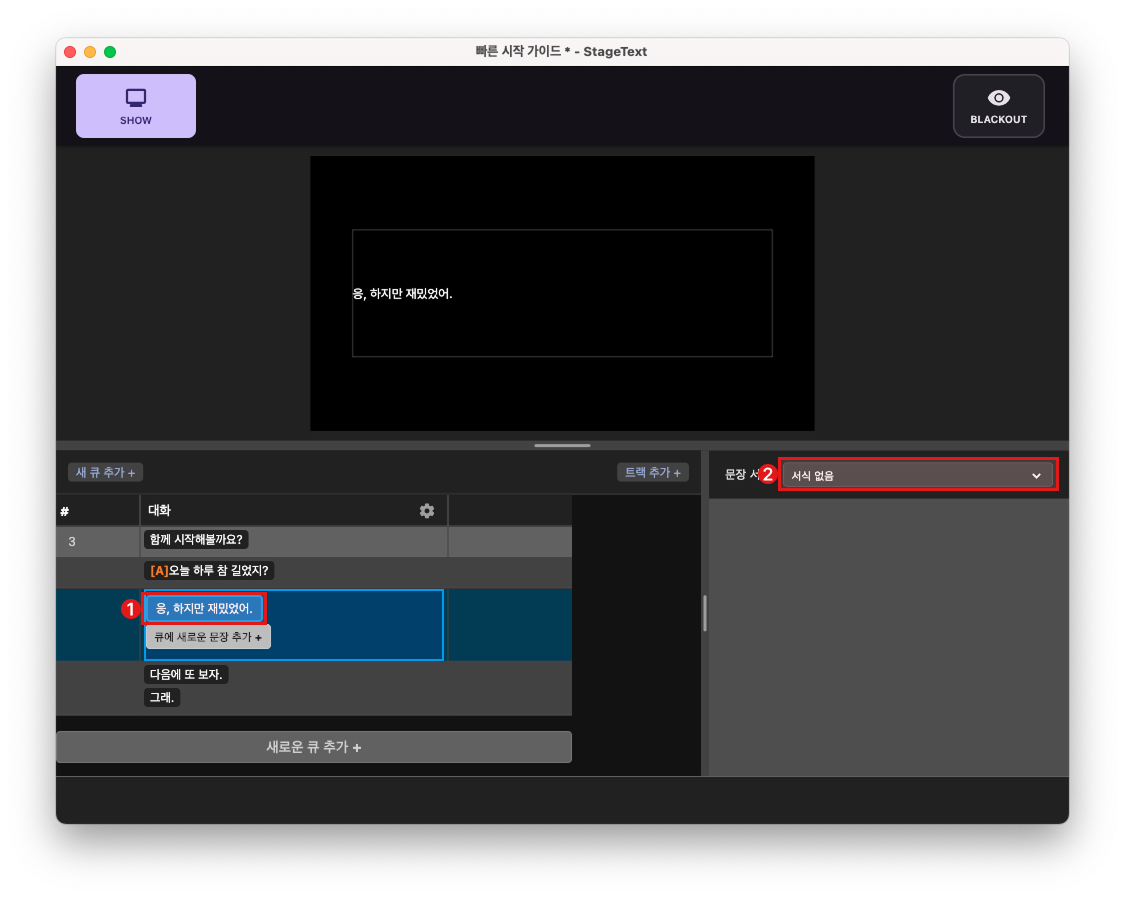
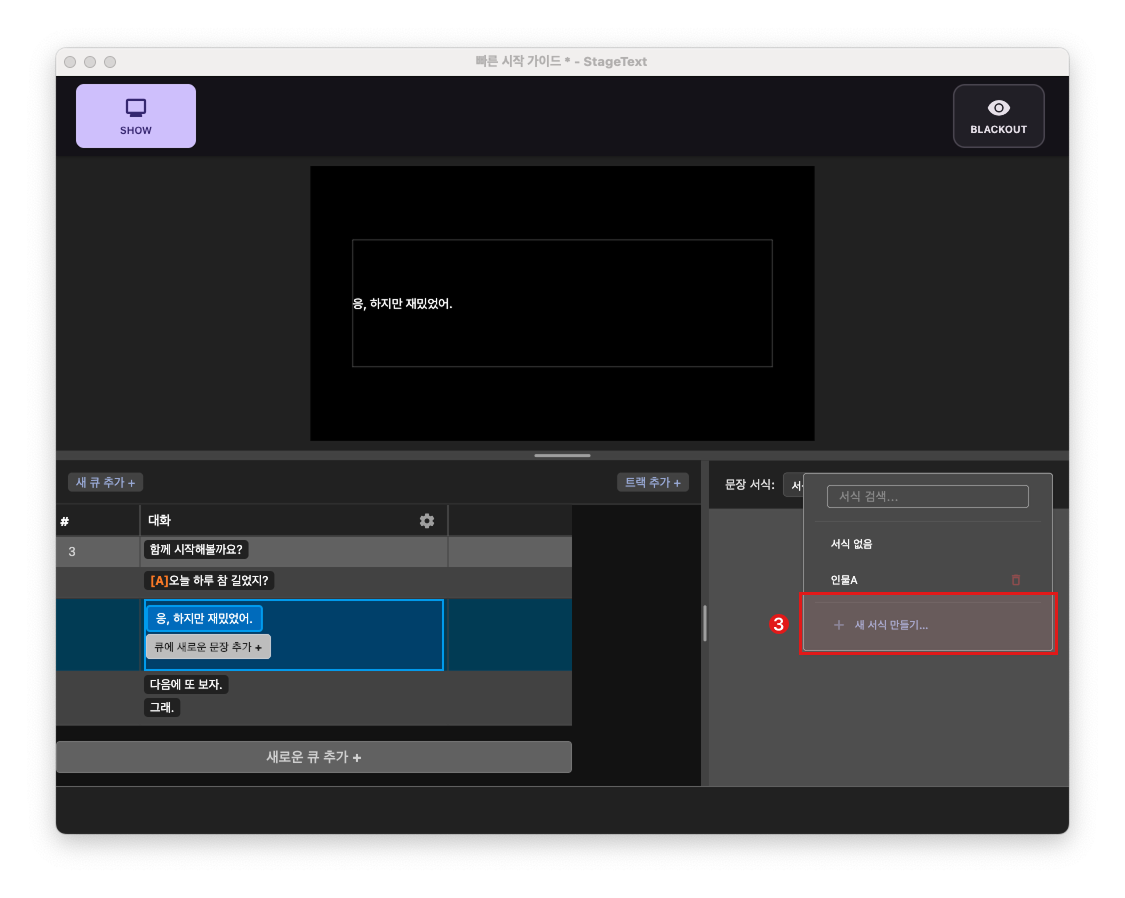
6. Click the next line, and in the inspector window header, click the style assignment dropdown and select + Create New Style....
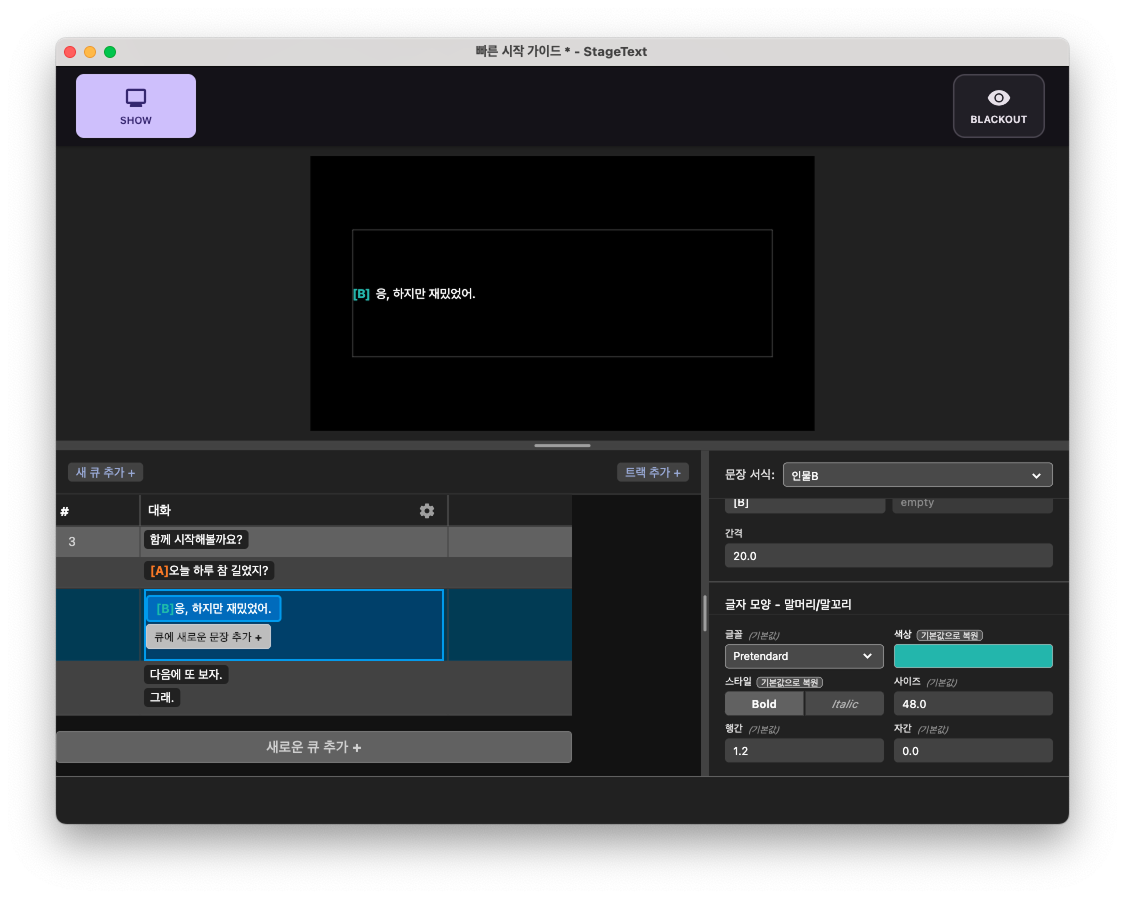
7. Repeat steps 3-5 to complete the formatting for Character B.
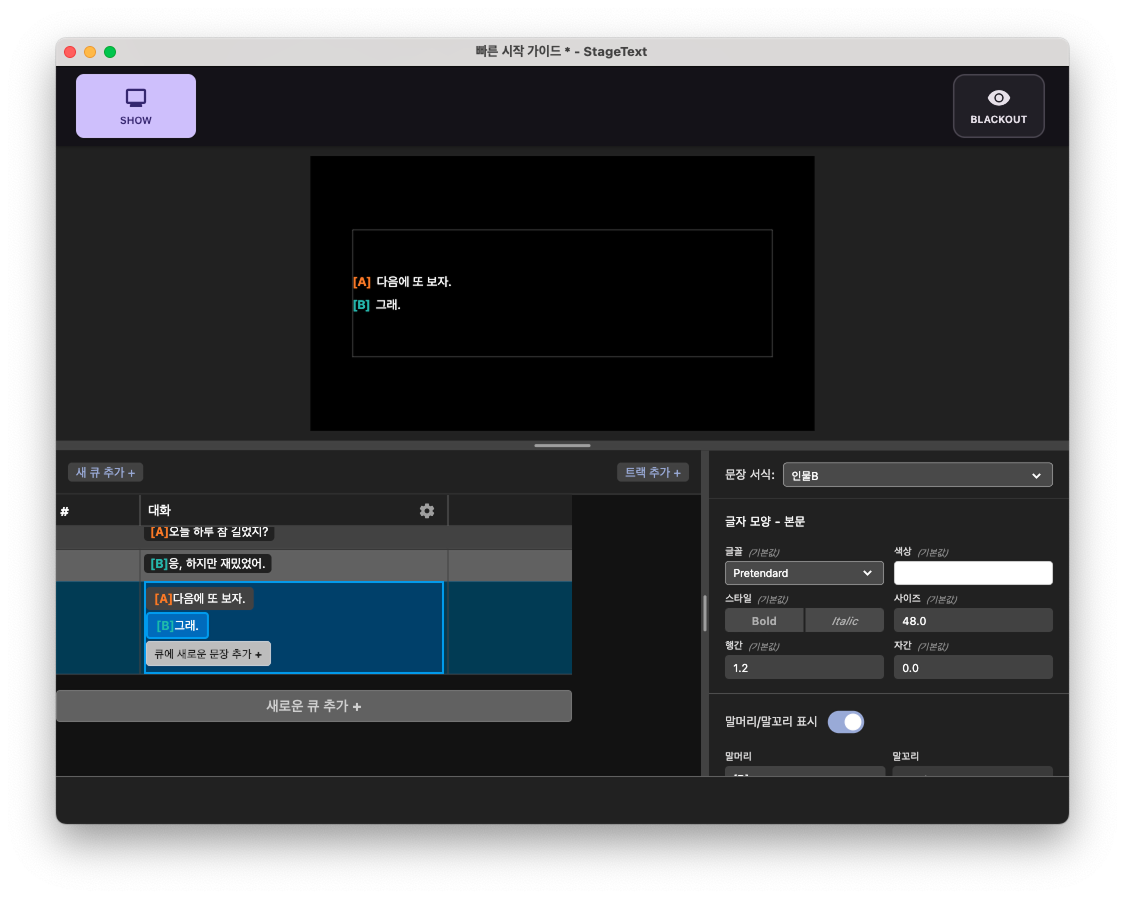
8. Click the line "See you next time.", then open the style assignment dropdown and set it to Character A. You can also use ⌥+ 1~9 shortcuts to quickly assign styles.
9. Similarly, repeat step 8 to set the style of the line "Sure." to Character B.
Step 5: Cleaning Up Existing Cues
Let's complete your first project by deleting the cues that were created by default in the project.
1. Select the "Welcome to StageText!" cue and press ⌘ + backspace to delete the cue. (If you select a line instead of a cue, only the line will be deleted. Press ⌘ + backspace once more to delete the cue as well.)
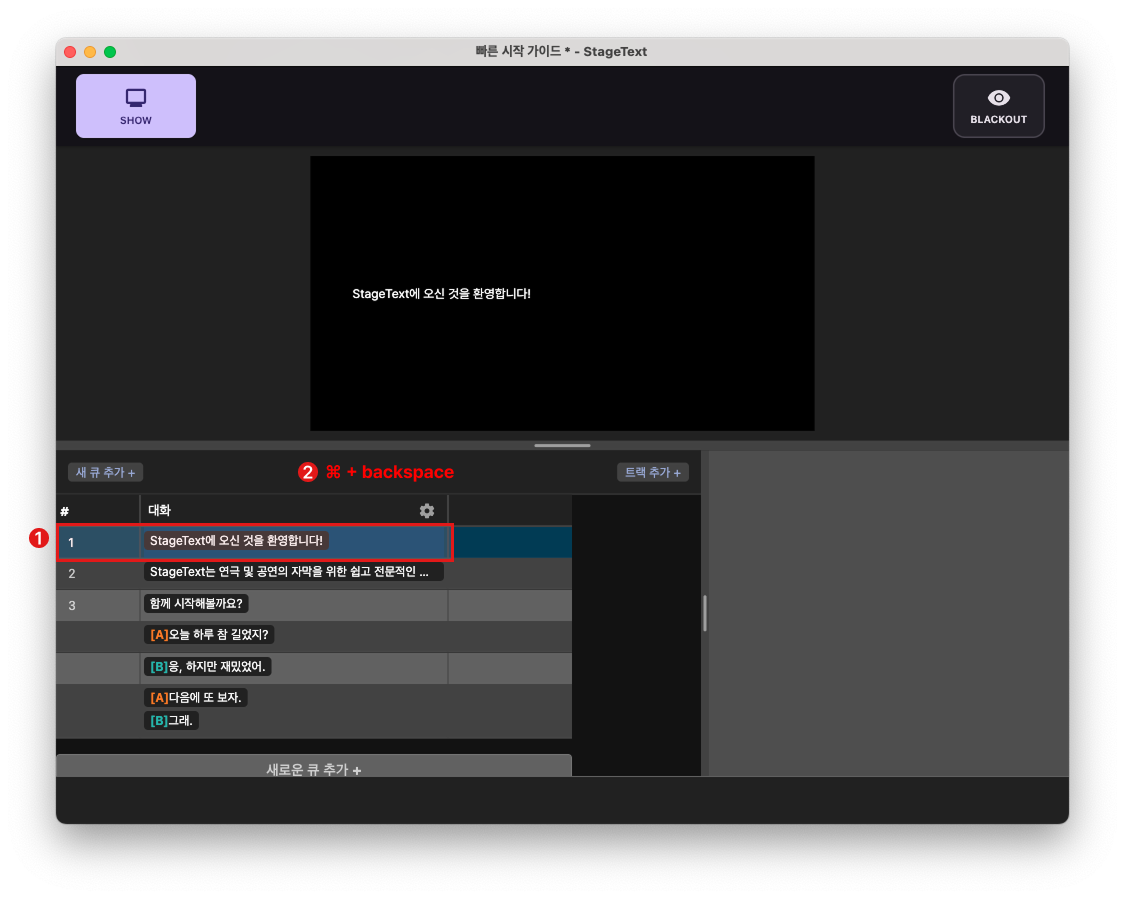
2. When you delete a cue, the next cue is automatically selected. Press ⌘ + backspace to delete the remaining cues.
🎉 🥳 You've completed your first project!
Step 6: Running Show Mode
Let's set up the display to use during the performance and run show mode.
(If you don't have a connected display, you can skip steps 1-3.)
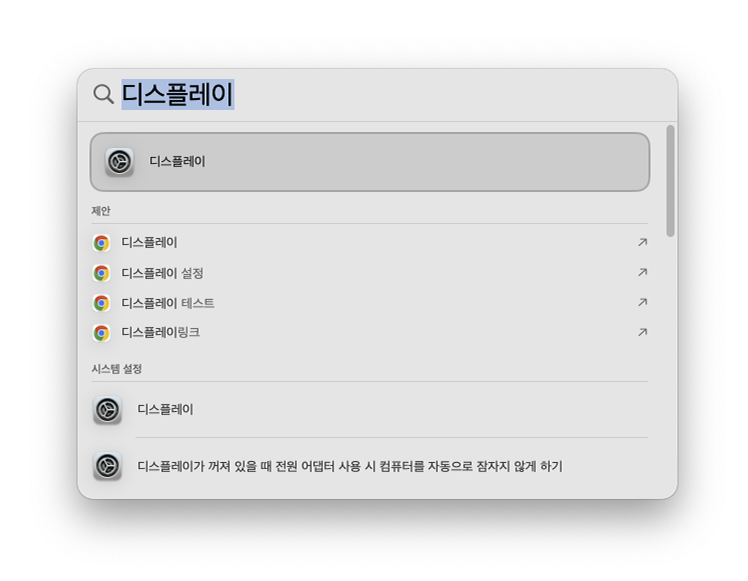
1. Press ⌘ + spacebar to launch Spotlight, search for display, and open Display settings.
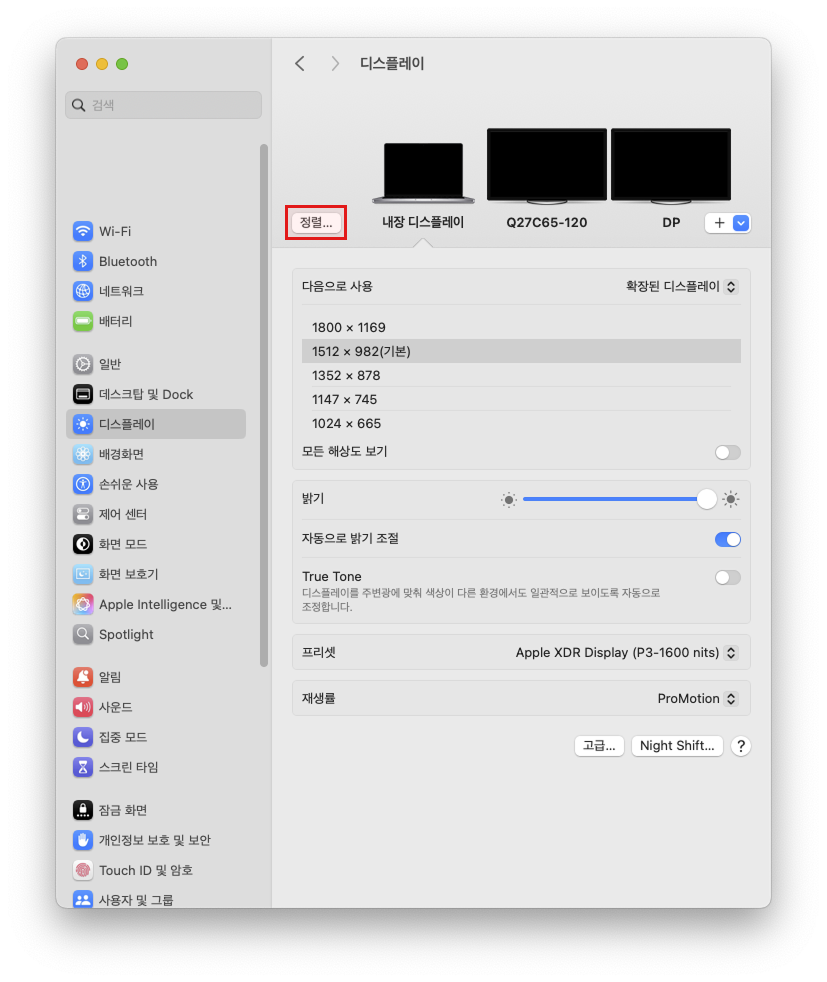
2. Click the Arrange button.
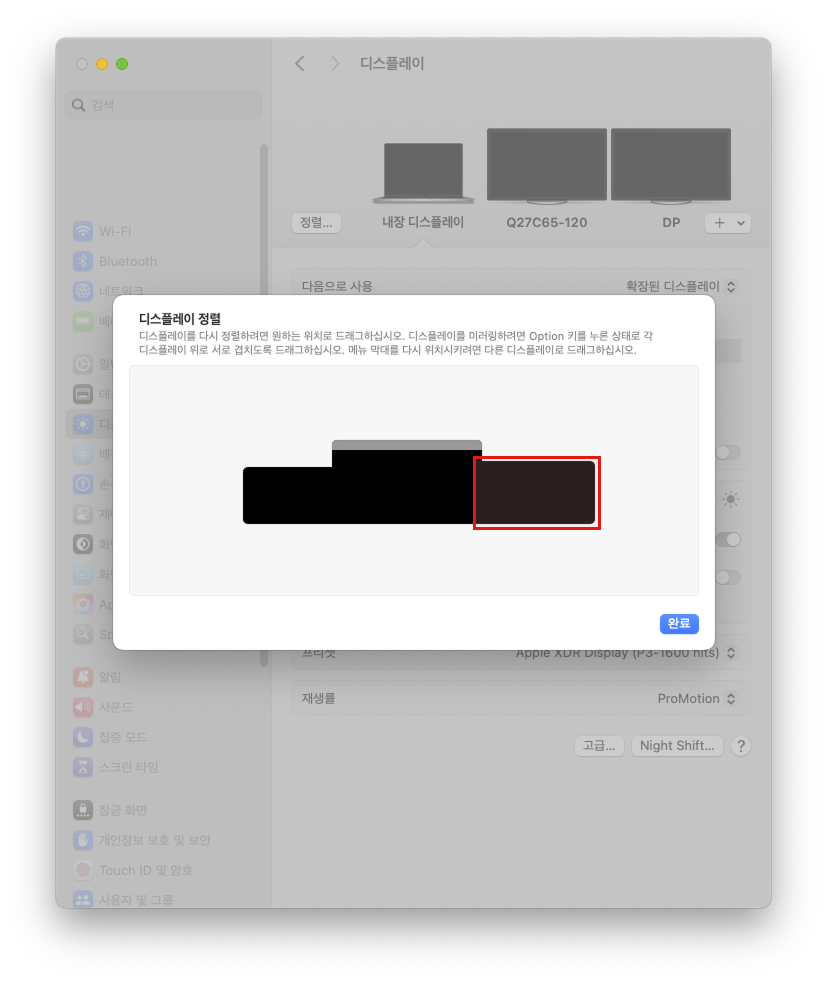
3. Place the display to use for show mode on the far right.
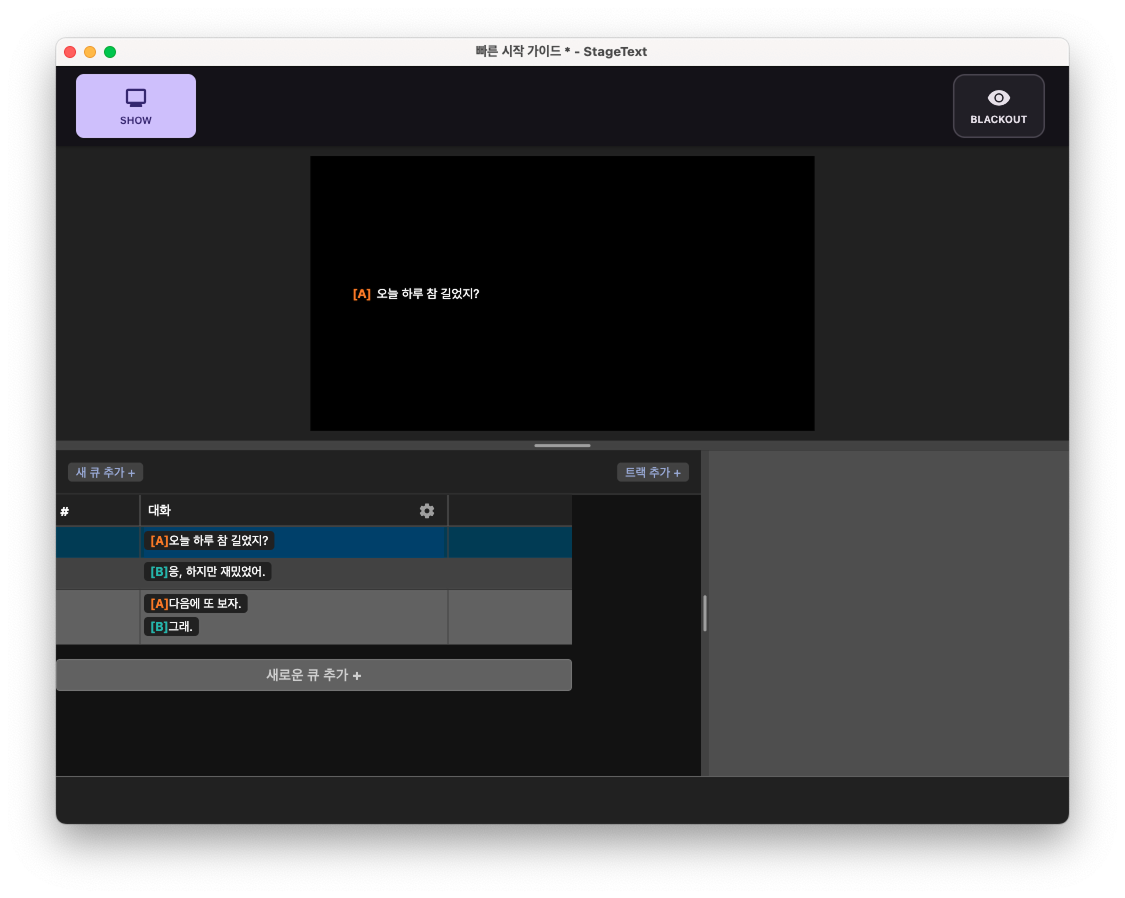
4. Return to the StageText window and click the SHOW button in the top bar, and the show screen will appear on the rightmost display.

Show Mode Shortcuts
- Spacebar: Move to next cue
- ↑↓ Arrows: Move to previous/next cue
- B: Toggle blackout
- ESC: Exit show mode
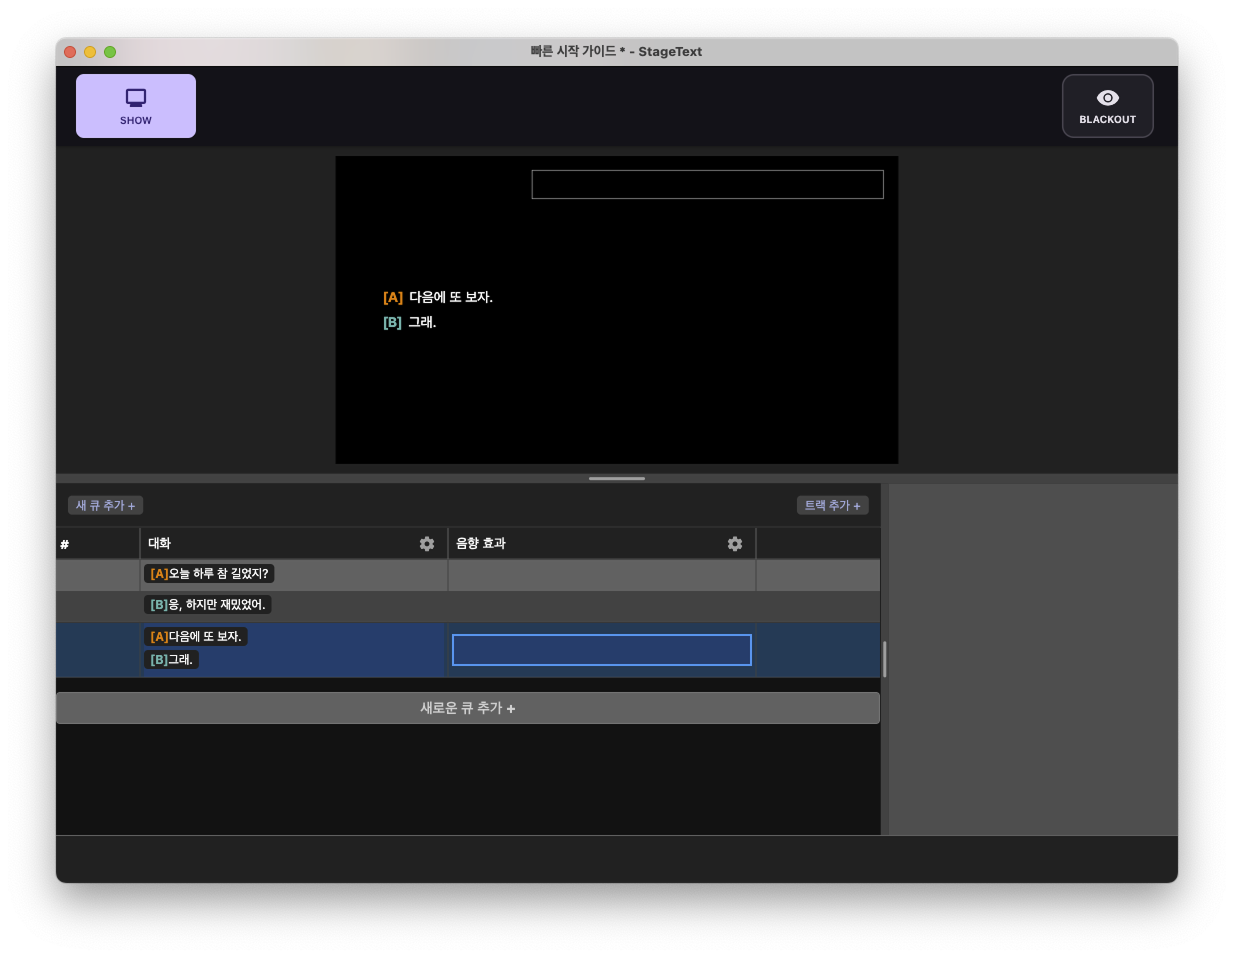
Step 7: Adding a Track
1. Click the Add Track + button in the upper right corner of the table window.
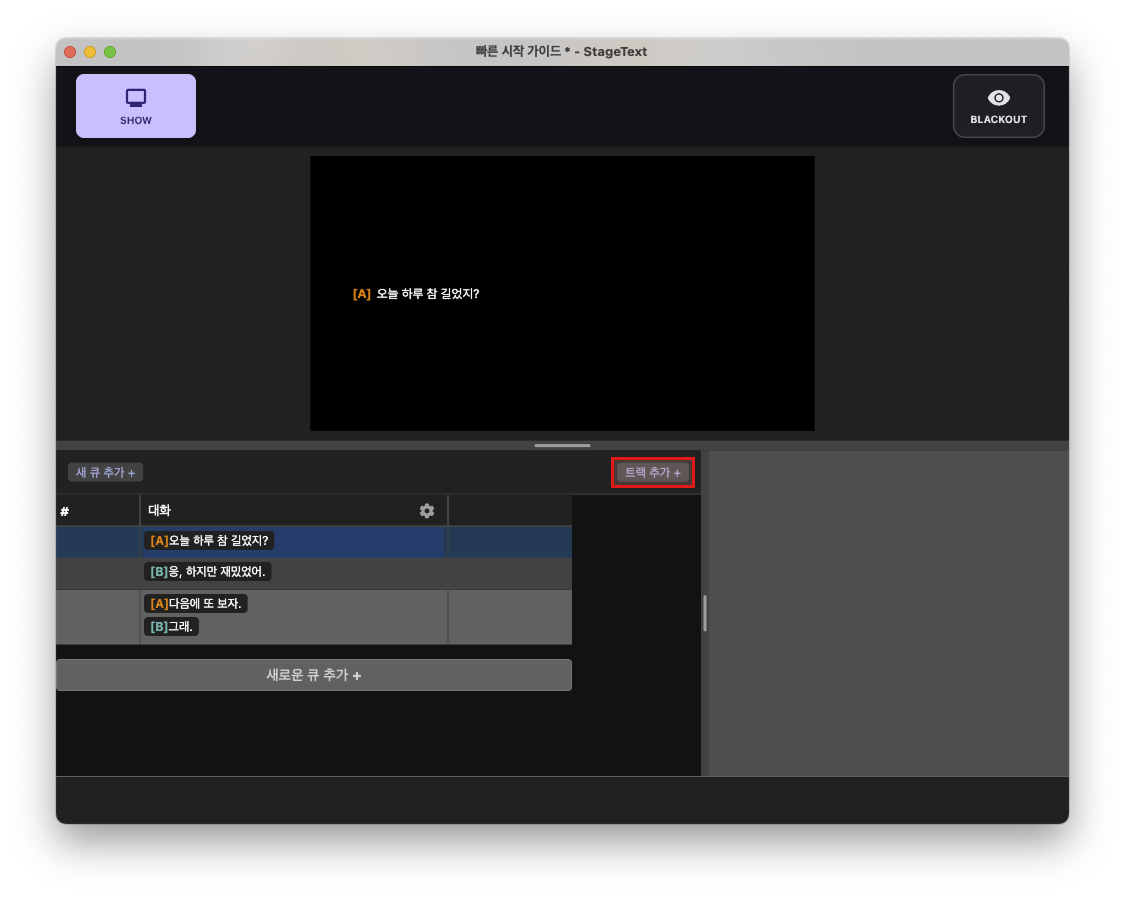
The newly created track is automatically selected.
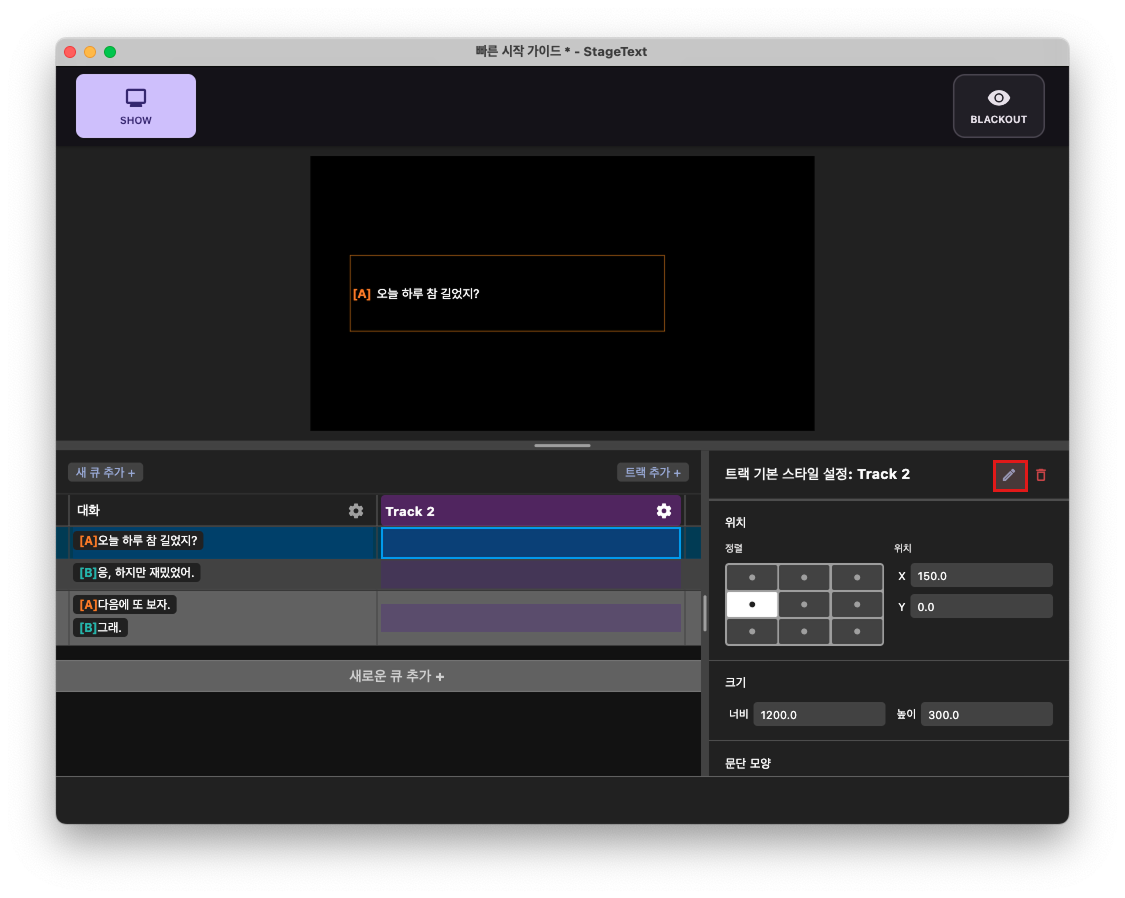
2. To rename the track, click the pencil icon button in the inspector window header.
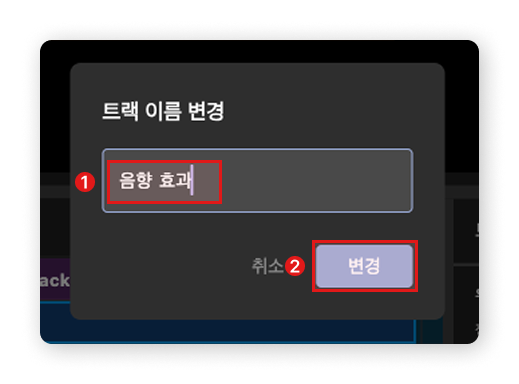
3. In the rename track popup, enter 'Sound Effects' and click the Change button to complete the modification.
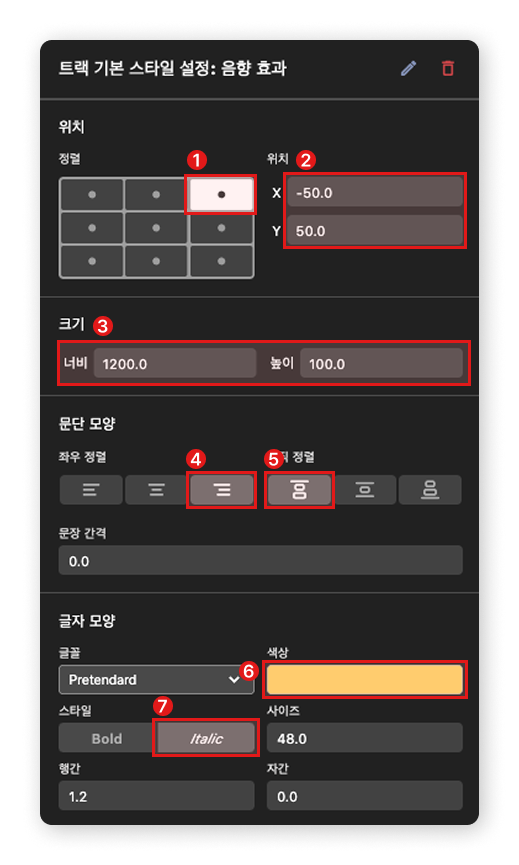
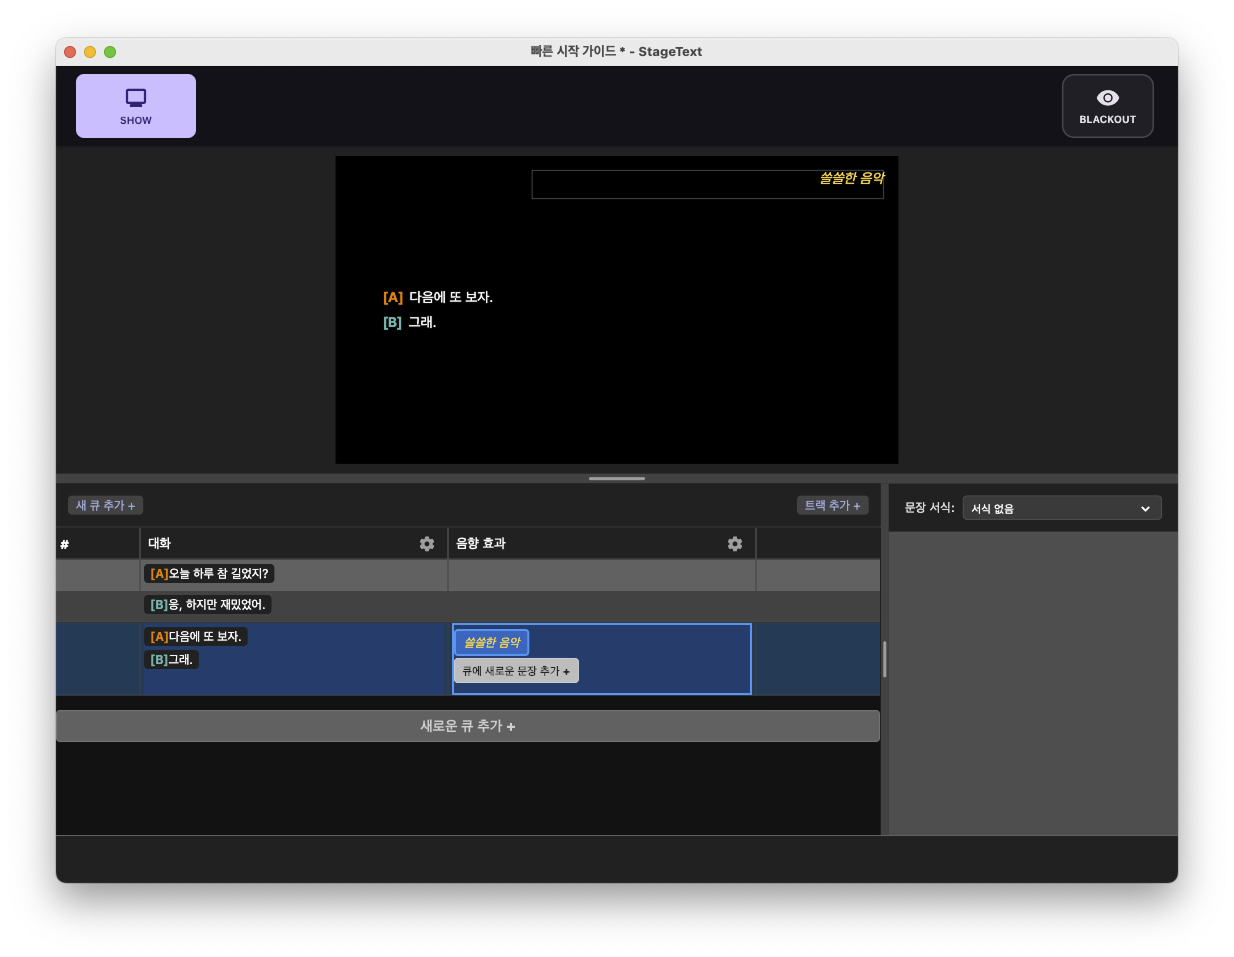
4. Set the values in the track's inspector window as shown below. If nothing appears in the inspector window, click the 'Sound Effects' track header once more.
5. Once you've finished the settings, select the last cell of the Sound Effects track, press Enter to edit the line, and press Enter again to complete editing.
Step 8: Saving Your Project
- File → Save (or ⌘ + S)
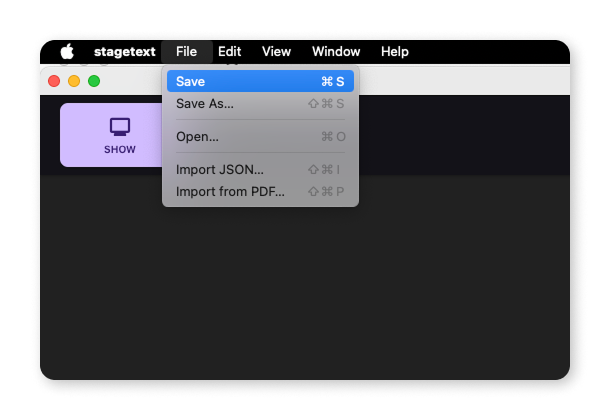
- Save to your desired location.
- You can reload it anytime with File → Open (or ⌘ + O).
🎉 Congratulations!
You've now experienced all of StageText's core features.
✅ Project creation and cue editing
✅ Character-specific styling
✅ Real-time preview
✅ Show mode subtitle display
✅ Project saving
🚀 Next Steps
💡 Quick Tips
Frequently Used Shortcuts
- Spacebar: Next cue
- ↑↓: Move cue
- Enter: Edit cell
- ESC: Exit edit mode
- Ctrl+Z: Undo
- F11: Show mode
When Problems Occur
- Undo: Restore previous state with Ctrl+Z
- Preview not showing: Check if a cue is selected
- Style not applied: Check if the line type is set correctly